Introduction
In an era where conserving water is more important than ever, designing a DIY water-saving irrigation system can help you reduce water usage while ensuring your plants thrive. Not only does this project support sustainability, but it also allows you to save money on your water bill. In this article, we will explore efficient design ideas, cost-saving tips, and affordable materials to create your own irrigation system.
Understanding Your Water Needs
Before diving into the design, it is crucial to assess your garden's water needs. Different plants require varying amounts of water, and understanding these needs can help you create a more efficient system. Start by considering the following:
- Plant Types: Identify the plants in your garden and their specific watering requirements.
- Soil Type: Different soil types retain moisture differently. Sandy soils drain quickly, while clay soils hold water.
- Local Climate: The climate in your area will influence how much water your plants need.
Choosing Affordable Materials
One of the keys to designing a budget-friendly irrigation system is selecting affordable materials. Here are some cost-effective options:
- Rain Barrels: Collect rainwater from your roof to use in your irrigation system. Rain barrels can be made from repurposed plastic containers or purchased at a low cost.
- Drip Irrigation Kits: These kits are often available at garden centers and can be installed easily. Look for kits that offer flexibility and customization for your garden.
- Hoses and Connectors: Use old hoses and connectors to save costs. You can cut and splice hoses to fit your garden layout.
- Soaker Hoses: These hoses are an excellent option for delivering water directly to the soil, minimizing evaporation.
Designing Your Irrigation System
Now that you understand your water needs and have selected affordable materials, it is time to design your irrigation system. Follow these steps:
Step 1: Plan Your Layout
Sketch a layout of your garden, including the locations of plants, paths, and any existing water sources. This plan will guide you in determining where to place hoses, drip lines, or soaker hoses.
Step 2: Install Rain Barrels
If you are using rain barrels, install them at downspouts to collect water efficiently. Ensure that the barrels are covered to prevent mosquito breeding and contamination. Use a spigot to make it easy to access the collected water.
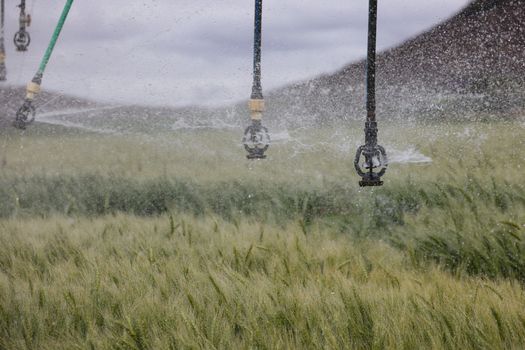
Step 3: Set Up Your Irrigation Lines
Using your plan, lay out your hoses or drip lines. Make sure to position them close to the base of your plants to target their root zones. If you are using a drip irrigation system, adjust the emitters according to the watering needs of each plant.
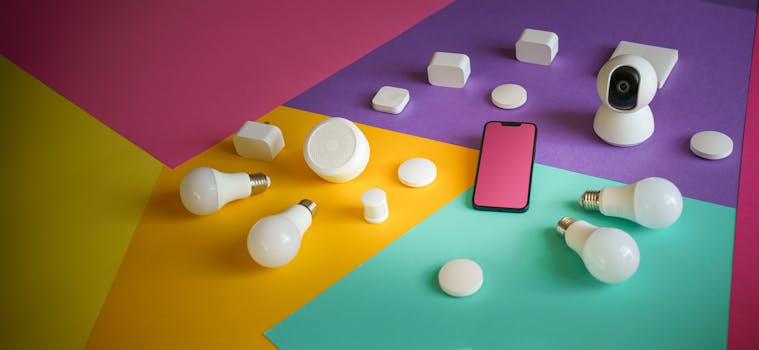
Step 4: Incorporate Timers
To further save water and ensure your plants receive consistent watering, consider incorporating a timer into your irrigation system. Timers can be programmed to water at specific times and durations, minimizing water waste. Options range from simple mechanical timers to smart timers that adapt to weather conditions.
Step 5: Test and Adjust
Once everything is set up, turn on your irrigation system and observe how it performs. Check for leaks and ensure that all areas of your garden are receiving adequate water. Make adjustments as needed to improve efficiency.
Maintaining Your Irrigation System
To maximize the efficiency of your DIY irrigation system, regular maintenance is essential. Here are some maintenance tips:
- Check for Clogs: Inspect hoses and emitters regularly for clogs or blockages. Clean out any debris to ensure proper water flow.
- Inspect Connections: Regularly check connections for leaks or wear. Replace any damaged parts promptly.
- Adjust for Seasons: As the seasons change, adjust your watering schedule to accommodate the varying water needs of your plants.
Final Thoughts
Designing an efficient DIY water-saving irrigation system is a rewarding project that can save you money and contribute to environmental sustainability. By assessing your garden's needs, choosing affordable materials, and following a well-thought-out design process, you can create an irrigation system that works for you. For further inspiration and plans, consider checking out Ted Water System, which offers a variety of resources for DIY projects.
FAQ
1. How much can I save with a DIY irrigation system?
On average, homeowners can save up to 30% on their water bills by implementing a DIY irrigation system, especially when using rainwater collection.
2. Can I automate my DIY irrigation system?
Yes! Many drip irrigation kits come with options to include timers or smart controllers that can automate your watering schedule based on weather conditions.
3. What is the best time to water my garden?
The best time to water your garden is early in the morning or late in the afternoon when temperatures are cooler, reducing evaporation and ensuring that plants absorb water efficiently.
📚 Related Articles
🔨 Want 16,000+ Water System Plans?
Get instant access to step-by-step plans with blueprints and cut lists.
Get Instant Access →